We like both green and red sauces on our open and stacked (not cooked in a cake pan in the oven) enchiladas. I just realized this weekend how easy it would be to grow, mix, and can our own sauce. Unfortunately, we did NOT plant tomatillos this year! Now I've planned to buy seeds to plant in our fall garden, to give this a try.
Here's a basic recipe, for those who have already asked.
5 jalapeño peppers
1/2 lbs of tomatillos (green husk tomato)
Peel and rinse the tomatillos. Boil the tomatillos along with the jalapeño peppers in a pot of water for about 7 minutes; they will become slightly soft. Remove the stems from the Jalapeños.
In a blender, place cooked tomatillos, jalapeños, salt and about 1/4 of a cup of the chicken stock; blend well. If the sauce is too thick, add more of the chicken stock. The sauce should has a consistency of soup.
Enjoy!
Javamom
Showing posts with label In my kitchen. Show all posts
Showing posts with label In my kitchen. Show all posts
12 June, 2011

07 October, 2010
Yummy Banana Bread

This recipe is slightly altered from our well-loved copy of Laurel's Kitchen Cookbook.
(for Ann in Faith :-)
Preheat oven to 375 degrees
3 very ripe bananas (1 cup mashed)
juice of one lemon
1/2 c. oil or butter (softened)
1/2 c. brown sugar
1 1/2 c. whole wheat flour
1/2 tsp. salt
1/2 tsp. baking powder
1/2 tsp. baking soda
1/2 cup wheat germ
optional:
1/2 c. dates (I did not add these)
1/2 c. toasted nuts (I used walnuts)
Mash bananas and mix them with lemon juice until smooth. Cream butter or oil and sugar together and add the banana mix, stirring well.
Sift together salt, flour, baking soda, baking powder. Mix in wheat germ. Add to the banana mixture and stir in dates and or nuts, if desired.
The dough will be very stiff, unless you use white flour instead of wheat.
(We were out of wheat when I made this batch, so I added about 1/4 extra wheat germ, and it was only sticky, not stiff).
Turn it into a greased loaf pan and bake for about 45 minutes. (or into muffin tins for muffins, baking only 30 minutes)
Fall baking has begun! What are some of your favorites at this time of year? I imagine lots of pumpkin-spice type breads and recipes. I will be making some of those myself, next time.
Javamom
07 August, 2010
Pear Jam 2010
 Simmer and soften chopped pears with fruit pectin and sugar.
 Add cinnamon. Boil, stirring constantly, for one full minute (I always go slightly longer)
 Fill cleaned, dried, (sanitized) hot jars (that have been washed and kept hot in a dishwasher or in a pan of simmering water) with cooked fruit jam mixture. Wipe the mouth of the jars with a clean, damp cloth, then add the lids. Turn upside-down to help create more pressure, so that the lids seal when turned over.
 Some seal right away, others need a few more minutes.
Violá!
Pear Jam!
Much more to do, but the pears need to soften for up to a week for easiest prep.
What are you harvesting and saving this summer?
Javamom
24 July, 2010
Cooking and Garden feasts
Our daughter texted me from a grocery store up in Omaha recently for ingredients to some of our favorite family meals, some of which make use of our summer garden produce. I decided to take some photos for her, and share them on the blog, in no particular order :-). We hardly used specific recipes anymore, we just slice, shred, and mix to our tastebuds' delight!
 One of my favorite summer snacks ~ marinating cucumbers in a little balsamic vinegar-water with a bit of onion.
 My mom always made these every summer. Adding balsamic vinegar instead of white vinegar is my own twist to this summer munchie.
 New Mexico sandia with red chile enchiladas on corn tortillas. This heat-filled beauty is Hubby's
 And this one is mine. It's a little milder with its Hatch, N.M. green chile enchilada sauce, black beans and cheddar in stacked corn tortillas. I wish it had white cheddar on it, instead, but this is what we had in the kitchen.
 garden-fresh tomatoes. We have not had as many this year. I think too much heat, then too much rain threw off the blossom-setting cycle.
 a menagerie of garden veggies picked this month
 Green chile and black bean enchiladas with garden veggies stuffed inside, topped with cilantro
 snow peas from early July
 These were made into a healthy squash casserole, which I did not get a picture of before eating it all up.

 One of my favorite summer snacks ~ marinating cucumbers in a little balsamic vinegar-water with a bit of onion.
 My mom always made these every summer. Adding balsamic vinegar instead of white vinegar is my own twist to this summer munchie.
 New Mexico sandia with red chile enchiladas on corn tortillas. This heat-filled beauty is Hubby's
 And this one is mine. It's a little milder with its Hatch, N.M. green chile enchilada sauce, black beans and cheddar in stacked corn tortillas. I wish it had white cheddar on it, instead, but this is what we had in the kitchen.
 garden-fresh tomatoes. We have not had as many this year. I think too much heat, then too much rain threw off the blossom-setting cycle.
 a menagerie of garden veggies picked this month
 Green chile and black bean enchiladas with garden veggies stuffed inside, topped with cilantro
 snow peas from early July
 These were made into a healthy squash casserole, which I did not get a picture of before eating it all up.
And these ripened and picked different days this week. I think I'll make a smoothie out of some of these this weekend.
 Friday's lunch ~ Sauteed fresh corn, onions, and garlic with black beans, folded into whole-grain quesadillas with fresh cilantro, then served with sliced avocado and salsa.
 Weekend brunch menu, recipe found here. This was recommended by two different friends, and I just happened to have everything needed for it, fresh from the cottage garden. I *wish* we had our own free-range chickens and eggs.
Now, I don't have photos of one of the main dishes that our daughter asked for, and that is chicken-broccoli-rice casserole. I will have to work on that and post it another time.
What have you been cooking up this summer?
Eat well,
 Friday's lunch ~ Sauteed fresh corn, onions, and garlic with black beans, folded into whole-grain quesadillas with fresh cilantro, then served with sliced avocado and salsa.
 Weekend brunch menu, recipe found here. This was recommended by two different friends, and I just happened to have everything needed for it, fresh from the cottage garden. I *wish* we had our own free-range chickens and eggs.
Now, I don't have photos of one of the main dishes that our daughter asked for, and that is chicken-broccoli-rice casserole. I will have to work on that and post it another time.
What have you been cooking up this summer?
Eat well,
Javamom
02 June, 2010
Black Bean Enchiladas

This is what I made from leftovers. It is a mixture of black beans, Hatch Green Enchilada sauce (from tomatillos), chopped onions, sour cream, cheddar and monterey jack cheeses, and one has rice in it as well. Once has fresh cilantro inside, the other sprinkled on top.
It was amazing. What are some of your favorite leftover creations?
Javamom
20 May, 2010
Buttercup Squash Soup
This fantastic recipe came to my attention today and I wanted to share the link with my friends.
We make two variations of this soup here the Bookncoffee house, but I am excited to try a different squash in the recipe. We are always open to new, healthy recipes to add to our regular meal rotation. Especially while in the typical 'slump' of just making 'the usual' because we are inundated with special events like graduations and their follow-up parties and weddings in this ever-so-busy month of May.
Do any of my readers have other squash or sweet potato soup recipes they'd like to share?
Running low on cooking inpsiration,
Javamom
We make two variations of this soup here the Bookncoffee house, but I am excited to try a different squash in the recipe. We are always open to new, healthy recipes to add to our regular meal rotation. Especially while in the typical 'slump' of just making 'the usual' because we are inundated with special events like graduations and their follow-up parties and weddings in this ever-so-busy month of May.
Do any of my readers have other squash or sweet potato soup recipes they'd like to share?
Running low on cooking inpsiration,
Javamom
06 September, 2009
Pear Jam-making Tips


Peel and chop pears into large chunks or slices. It really doesn't matter, because you will be mashing them in the pan later, anyway. Sprinkle with Fruit Fresh or with lemon juice to keep from turning brown. I use my 4-cup Pyrex measuring (glass) bowl with spout.
I like the fruit to be just a little softened up before making jam. Pears seem to have more juice at that point than when they are rock hard. Peel in such a way as to collect as much of the dripping loveliness of the juice in the bowl or container as possible. Having two containers close by is a must. One for the peels and cores (compost them) and the other for the juice and to hold roughly sliced-off chunks. Once I have my 4-4.5 cups worth of chopped pears, I pour them into a large pan (deep skillet in this case, but I've made them in glass cooking pots in the past). I cook these on medium heat as I use a potato masher to smoosh them smaller. Smoosh them as fine as you prefer. I like to have about 1/4 inch sized pieces of fruit in our jam. Since the chunks are so soft from the cooking, it spreads well on biscuits or toast just fine. I also like to add cinnamon to the batch...the amount varies for personal preference. If you are a nutmeg fan, add a dash of that, as well for a nice taste of autumn in your jam.
Follow the instructions in the fruit pectin you have purchased. I have used both Sure-Jell and Ball fruit pectin over the years, and have also used regular, low and no-sugar, or sugar-free. Read your package instructions carefully, as with the Ball sugar-free pectin, you will need to purchase Splenda in place of the sugar. It seems like the Sure-jell low sugar pectin worked well, but still required some sugar. Again, read the packages and recipes carefully. They are pretty adamant that you should follow all measurements exactly. I have fudged some and squeezed in a little extra fruit quite a few times. The Sure-Jell does not work as well when I do this, but the Ball brand works GREAT. For low-sugar, try the Sure-Jell pink box pectin. Otherwise, I really prefer Ball brand overall for full sugar and no-sugar (Splenda) for relatives who need sugar-free jam because of health and diet restrictions.
Pre-wash jars and lids. I like to run the jars and rings through the dishwasher before using. I don't know if the heat of the dishwasher is too much for the flat lids with new seals, so I wash them separately in sudsy water in the sink, to be certain I don't ruin the seal mechanism. I have a lot of jars leftover from past years, and these definitely need a good washing. I usually do this the night before I plan to cook up the jam. Rinse everything very well. Somewhere years ago, it seems like I also read not to use metal utensils. That's probably why I used to cook up the jam mixture in glass cooking pans for years. I use wooden spoons, ladles, or in a pinch, my plastic ladle. I'm trying not to use plastic much anymore, but hubby has yet to make me a food-safe, large, wooden ladle.
 The next day, I place several of the jars and the lids and rings in a simmering water-bath to keep them sterilized and hot. Just before I need them, I use tongs and lift them out of the water and onto clean paper towels on the counter to drip dry.
After they are dry, I turn them right-side-up and fill with the cook jam mixture, which is also piping hot. Ladle jam mixture into jars, leaving a little room at the top, about 1/2 inch. I like to load up and seal one jar at a time. Clean the rim of any jam residue left from filling the jar. I use a tiny edge of a clean tea towel that I've dipped in the water bath. I make sure it gets the top of the rim and the threads of the jar. I also make sure it is dry with another dry part of the clean tea towel, so that water will not hamper a good seal. Make sure the flat lid and the ring is also free of water, but try not to touch any of the insides to keep it sterile. Place flat on top of filled jar, tighten on the ring as tightly as possible, then turn up-side-down. This helps to form a vacuum to seal the jar better. Keep turned up-side-down as in the photo below as the jars cool down for about 30 minutes.

Next, turn them upright and the jars will be on their way to sealing; completing the sealing process as the jam is pulled by gravity down to the bottom of the jars. Yes, you may push any "clicking" lids down to help it out! I always do this. If they are still quite warm, you will notice resistance from the lid, but they do pretty much always seal down on their own fairly quickly.
If you happen to have some that don't (I have not had one do this to me in a couple of years), you may place them in your dutch oven filled with hot water and let that water slow-boil over the jars for a time. I don't remember if its five minutes or more, and that can be easily googled fyc, but you must make sure that the jars completely submerge in the water bath.
 I may have missed something in my haste to post this for a friend who needs this asap, but these are the most important things to know, complete with visual aids!
  Let me know if you try this at home and how it goes!
Sincerely,
Java(Jam)mom
30 August, 2009
Grilled Alfredo Pizza
This recipe is a combination of a couple of different meal ideas we picked up this summer. We made these on our grill for the wedding party the day after our son and daughter-in-law's wedding in early July. It was a huge hit, not only because it tasted so good, but because everyone participated in the making of their own pizzas.
Using either your favorite or a standard dough recipe, roll out personal sized crusts. You can roll out larger pizzas for this, we just found it fun to have a lot of toppings in different bowls so each person can choose their own favorites. Make sure your grill is nice and warmed up, but on low. It is too easy to burn these, and the main point is to help the dough "set up" firmly to hold the toppings and not become soggy. Brown only slightly on one side then remove from grill. Note that this step takes only about a minute!
Each person can take their own pizza dough round and add their favorite sauce, either tomato or Alfredo, spreading with the back of a large wooden spoon to the browned side of the dough. Add toppings of choice, such as chopped or sliced, colorful bell peppers, shredded zucchini, baby spinach, onions, artichoke hearts, olives, pineapple chunks, meat of choice, what-have-you. Next, place pizzas back on the grill to toast the other side, warm the veggies and or meat through, and to melt your cheeses. This takes a little bit longer than the first grilling, and watch closely to prevent burning the bottoms. If you prefer, you may keep foil under your pizzas to help prevent burning.
The sauce most in demand around here is a doctored-up Alfredo sauce (recipe below). After adding the sauce of your choice, add veggies and/or meat, top it all off with either mozzarella or smoked Gouda cheese, perhaps a little of both! When the pizzas come off the grill, we also have small bowls of fresh grated Romano cheese and crushed red peppers, for those who want them.
If we have cooked chicken to add as another topping, we'll marinate it in balsamic vinegar, then pre-cook it before the party, and chop fine.
While your grill is warming up, cook up some enhanced Alfredo pizza sauce:
8 oz. of mushrooms, sliced or diced, whichever you prefer)
1/2 cup onion of choice, chopped (more if you like!)
2 T. butter or olive oil
1-2 garlic cloves, chopped fine. (If you pre-roast the garlic, it adds another amazing flavor layer to the sauce)
1 jar of basic Alfredo sauce, or make your own!
Warm your skillet well, add the oil or butter and spread around the skillet, then saute onions and mushrooms, adding the garlic when the onion and mushrooms are softened and lightly browned. Add the jar of Alfredo sauce to the pan and warm through. Lower temp and keep warm till guests are ready to begin building their pizzas.
Gluten-Free Option:
We bought pre-made gluten free crusts for one or two of our guests the couple of times we have shared and cooked this with company. Gluten-free crust recipes can be found here . I can't vouch for those particular recipes as of yet, since I haven't personally tried them. Feel free to send your tried-and-true recipes to me, if you'd like!
Enjoy!
Javamom
Using either your favorite or a standard dough recipe, roll out personal sized crusts. You can roll out larger pizzas for this, we just found it fun to have a lot of toppings in different bowls so each person can choose their own favorites. Make sure your grill is nice and warmed up, but on low. It is too easy to burn these, and the main point is to help the dough "set up" firmly to hold the toppings and not become soggy. Brown only slightly on one side then remove from grill. Note that this step takes only about a minute!
Each person can take their own pizza dough round and add their favorite sauce, either tomato or Alfredo, spreading with the back of a large wooden spoon to the browned side of the dough. Add toppings of choice, such as chopped or sliced, colorful bell peppers, shredded zucchini, baby spinach, onions, artichoke hearts, olives, pineapple chunks, meat of choice, what-have-you. Next, place pizzas back on the grill to toast the other side, warm the veggies and or meat through, and to melt your cheeses. This takes a little bit longer than the first grilling, and watch closely to prevent burning the bottoms. If you prefer, you may keep foil under your pizzas to help prevent burning.
The sauce most in demand around here is a doctored-up Alfredo sauce (recipe below). After adding the sauce of your choice, add veggies and/or meat, top it all off with either mozzarella or smoked Gouda cheese, perhaps a little of both! When the pizzas come off the grill, we also have small bowls of fresh grated Romano cheese and crushed red peppers, for those who want them.
If we have cooked chicken to add as another topping, we'll marinate it in balsamic vinegar, then pre-cook it before the party, and chop fine.
While your grill is warming up, cook up some enhanced Alfredo pizza sauce:
8 oz. of mushrooms, sliced or diced, whichever you prefer)
1/2 cup onion of choice, chopped (more if you like!)
2 T. butter or olive oil
1-2 garlic cloves, chopped fine. (If you pre-roast the garlic, it adds another amazing flavor layer to the sauce)
1 jar of basic Alfredo sauce, or make your own!
Warm your skillet well, add the oil or butter and spread around the skillet, then saute onions and mushrooms, adding the garlic when the onion and mushrooms are softened and lightly browned. Add the jar of Alfredo sauce to the pan and warm through. Lower temp and keep warm till guests are ready to begin building their pizzas.
Gluten-Free Option:
We bought pre-made gluten free crusts for one or two of our guests the couple of times we have shared and cooked this with company. Gluten-free crust recipes can be found here . I can't vouch for those particular recipes as of yet, since I haven't personally tried them. Feel free to send your tried-and-true recipes to me, if you'd like!
Enjoy!
Javamom
26 May, 2008
Preparing blackberries for various uses
The joy of eating fresh blackberries, alone or with granola, is one of which we cannot get enough! However, we cannot eat the fresh ones completely before they spoil, so gallons have been flash frozen for later usage with whole-grain pancakes, muffins, fruit desserts, etc. I've also begun making jam. I hope to finish that up today. In the first photo, I am drying the berries before lightly mashing them to cook into jam.

I have set larger ones aside (in the small plastic container) to go with the homemade cake for individual cups of blackberry trifle that we will have with our Memorial Day meal today.
 Pound cake made by The Hubster! We were both in the mood to cook something up.
 I decided to throw a few frozen berries into a sparkling berry drink, to see how it worked and tasted. It looks pretty festive, and it was very tasty! I ended up adding more than this, and a few of them were quite tart.

Here, I am scooping the hot jam into jars for canning. I have a couple of more containers full to cook up, so will be busy again today. It's such a "good" busy though, and I find that I am sleeping better after all this harvesting and prepping! It is all very satisfying, and a sure sign that summer is officially upon us!
How has your summer begun?
Javamom

I have set larger ones aside (in the small plastic container) to go with the homemade cake for individual cups of blackberry trifle that we will have with our Memorial Day meal today.
 Pound cake made by The Hubster! We were both in the mood to cook something up.
 I decided to throw a few frozen berries into a sparkling berry drink, to see how it worked and tasted. It looks pretty festive, and it was very tasty! I ended up adding more than this, and a few of them were quite tart.
Here, I am scooping the hot jam into jars for canning. I have a couple of more containers full to cook up, so will be busy again today. It's such a "good" busy though, and I find that I am sleeping better after all this harvesting and prepping! It is all very satisfying, and a sure sign that summer is officially upon us!
How has your summer begun?
Javamom
29 October, 2007
Cat treats!
Tigger (photo-scroll down on the right) loves to snack on foods with grains in them. This recipe came into my inbox just today from Petplace.com. There is a recipe for doggie treats, too...but I don't have a dog. Go to the link to try the doggie treats!
TASTY CAT CLAWS
Makes 18 treats
1/4 cup warm water
5 tablespoons parmesan cheese
3 tablespoons soft margarine
1 tablespoon cod liver oil
1 cup white flour
1/4 cup soy flour
29 June, 2007
Moros y Cristianos
Donna-Jean lives in Jersey and probably has not seen or tried this dish before, so she requested that I post the recipe. Happily I do so, along with a little history of the dish! It's so very simple and humble, yet so very healthy.
Interestingly, whilst Hubster and I ventured over to Half-Price Bookstore today after teaching summer school, Hubs noticed a recipe for said favorite dish in a Spanish cookbook, with the name of Moros y Cristianos(!) - harkening back to the days when Spain was freed from the clutches of the Moors. ¡Es muy interesante! I never knew this before.
Hubster and I first tried this dish when eating with a favorite set of mentors whom we knew back in Oklahoma City. We used to go long-distance cycling with them. He worked for the FAA and she was an art teacher in the local school district. Their home was multi-level and incredibly artsy, complete with African art and a propped-up wooden door with stuffed socks sticking out of it. After one of our long rides with them, they fed us "Cuban Black Beans and Rice" for dinner.
We were more into vegetarian food at the time, and this dish appealed to us, as it made a complete protein when combined with cheese, avocado, tomato, onions, salsa and sour cream.
Black beans and rice is a popular Cuban dish said to bring good luck when eaten on New Year's Day. This reminds me of the Southern tradition I grew up with: eating black-eyed peas every New Year's Day.
In Spanish, the dish is called Moros y Cristianos or Moors & Christians (amazing, eh?), with the black beans representing the Moors and the white rice representing the Christians.
Our kids grew up calling it "Black Bean Mountain!"
I prefer short grain brown rice, but hubby prefers Uncle Ben's "converted" (notice the pun ;) rice (aka parboiled rice) in the orange bag, dontcha know! It is a very consistent rice, and is less sticky.
Here is one fast and easy recipe that we use most often.
Pick out any rocks from the dried bean package and rinse beans well. Soak and cook the black beans as per the package directions. There is less staining if you pour off the soaking water and add fresh water for cooking the next day. I like to add chicken or beef bouillon as a stock (traditional is pork broth), to make it richer, plus onion and/or garlic powder. If you have soaked the beans overnight, they will cook in a stock pot in 1 1/2 hours time.
Cook your favorite rice of choice separately. At serving time, have nice bowls of individually chopped tomatoes, onions; shredded colby-jack, cheddar, or mexican cheese; sour cream, guacamole or just plain avocado slices, cilantro, and salsa on the table for family and guests to add what they choose.
Supply ample tortilla chips or fresh tortillas to eat along with this dish.
Here's another recipe ~
INGREDIENTS:
1 cup chopped onion
1 cup chopped green bell pepper (optional--we prefer hotter peppers most of the time)
2 teaspoons chopped garlic
1-1/2 teaspoons ground cumin
1 teaspoon dried thyme leaves
1/2 teaspoon crushed red pepper
1 bay leaf
1 Tablespoon olive oil
1 cup rice
1 can (14-1/2 ounces) diced tomatoes with green chilies
1 can (15 ounces) black beans or 1-1/2 cups cooked dry-packaged black beans rinsed, drained
2 cups water
1 Tablespoon apple cider vinegar
1/2 to 1 teaspoon salt (optional)
1/2 teaspoon black pepper
PREPARATION:
Saute onion, bell pepper, garlic, cumin, thyme, crushed red pepper, and bay leaf in olive oil until onion is tender, about 5 minutes.
Enjoy!!
Señora Javamom
Interestingly, whilst Hubster and I ventured over to Half-Price Bookstore today after teaching summer school, Hubs noticed a recipe for said favorite dish in a Spanish cookbook, with the name of Moros y Cristianos(!) - harkening back to the days when Spain was freed from the clutches of the Moors. ¡Es muy interesante! I never knew this before.
Hubster and I first tried this dish when eating with a favorite set of mentors whom we knew back in Oklahoma City. We used to go long-distance cycling with them. He worked for the FAA and she was an art teacher in the local school district. Their home was multi-level and incredibly artsy, complete with African art and a propped-up wooden door with stuffed socks sticking out of it. After one of our long rides with them, they fed us "Cuban Black Beans and Rice" for dinner.
We were more into vegetarian food at the time, and this dish appealed to us, as it made a complete protein when combined with cheese, avocado, tomato, onions, salsa and sour cream.
Black beans and rice is a popular Cuban dish said to bring good luck when eaten on New Year's Day. This reminds me of the Southern tradition I grew up with: eating black-eyed peas every New Year's Day.
In Spanish, the dish is called Moros y Cristianos or Moors & Christians (amazing, eh?), with the black beans representing the Moors and the white rice representing the Christians.
Our kids grew up calling it "Black Bean Mountain!"
I prefer short grain brown rice, but hubby prefers Uncle Ben's "converted" (notice the pun ;) rice (aka parboiled rice) in the orange bag, dontcha know! It is a very consistent rice, and is less sticky.
Here is one fast and easy recipe that we use most often.
Pick out any rocks from the dried bean package and rinse beans well. Soak and cook the black beans as per the package directions. There is less staining if you pour off the soaking water and add fresh water for cooking the next day. I like to add chicken or beef bouillon as a stock (traditional is pork broth), to make it richer, plus onion and/or garlic powder. If you have soaked the beans overnight, they will cook in a stock pot in 1 1/2 hours time.
Cook your favorite rice of choice separately. At serving time, have nice bowls of individually chopped tomatoes, onions; shredded colby-jack, cheddar, or mexican cheese; sour cream, guacamole or just plain avocado slices, cilantro, and salsa on the table for family and guests to add what they choose.
Supply ample tortilla chips or fresh tortillas to eat along with this dish.
Here's another recipe ~
INGREDIENTS:
1 cup chopped onion
1 cup chopped green bell pepper (optional--we prefer hotter peppers most of the time)
2 teaspoons chopped garlic
1-1/2 teaspoons ground cumin
1 teaspoon dried thyme leaves
1/2 teaspoon crushed red pepper
1 bay leaf
1 Tablespoon olive oil
1 cup rice
1 can (14-1/2 ounces) diced tomatoes with green chilies
1 can (15 ounces) black beans or 1-1/2 cups cooked dry-packaged black beans rinsed, drained
2 cups water
1 Tablespoon apple cider vinegar
1/2 to 1 teaspoon salt (optional)
1/2 teaspoon black pepper
PREPARATION:
Saute onion, bell pepper, garlic, cumin, thyme, crushed red pepper, and bay leaf in olive oil until onion is tender, about 5 minutes.
Enjoy!!
Señora Javamom
27 June, 2007
Family Favorite


I prepared black beans in the crockpot yesterday knowing that I didn't have a lot of time for meal prep this week. When our flooding scare had passed, we were able to sit calmly and enjoy a colorful, delicious, and filling meal. I left the sour creme off this time, but the salsa is homemade and fresh, and our daughter made the guacamole. The avocados were beautiful!
22 February, 2006
What's in Your Kitchen?
This reminds me of the old Hee-Haw show..."Grandpa, what's for dinner?"
I've been tagged by coffeemama from Our Blue Castle to play along.
1. How many meals does most of your family eat at home each week? HOw many are in your family?
18 meals; six people. Hubby runs the before and afterschool care program (as well as teaching), so he eats breakfast and lunch and after school snack at his school~oftentimes skipping lunch.
2. How many cookbooks do you own?
20-25
3. How often do you refer to a cookbook each week?
Almost never
4. Do you collect recipes from other sources? If so, what are some of your favorite sources
Rarely. I don't do well with loose paper scraps, (The paper mess is a hangup of mine). They tend to pile up, never to be used, only to be thrown away. If I file them away, they are out of site and out of mind, and I rarely refer back to them again. I *DO* like being able to go online (to cooks.com) to find any special recipe that I want to use. I DO buy a cookbook if I am in another country, of that country's typical dishes.
5. How do you store those recipes?
I have a bunch of my Granny's recipes in a small binder that I made in early marriage. I also have a shoebox of favorites from early marriage and Boston that I finally got out of the tiny cabinet above the fridge. It had been stored there for 13 years (as I said, out of site, out of mind) without ever looking into it for our old favorites (for example: spoon bread).
6. When you cook, do you follow the recipe pretty closely, or do you use recipes primarily to give you ideas?
Yes and no. For baking, I follow it pretty much to the T. Hubby and I both cook from memory, possibly adding our own ideas and flair to a given dish.
7. Is there a particular ethnic style or flavor that predominates in your cooking? If so, what is it?
Hubby loves to use chiles for spice in almost anything he cooks. My favorite addition is oregano, cilantro, or soy sauce. So, Mediterranean, Mexican, then Asian would be our most common themes.
8. What's your favorite kitchen task related to meal planning and preparation? (eating the finished product does not count)
Chopping and sauteing the onions; Serving up our food in bowls to be taken to the table.
9. What's your least favorite part?
Preparing the lettuce for a salad.
10. Do you plan menus before you shop?
Rarely.
11. What are your three favorite kitchen tools or appliances?
kitchen shears; cappuccino maker; milk foaming whipper :-)
12. If you could buy one new thing for your kitchen, money was no object, and space not an issue, what would you most like to have?
A deep freezer
13. Since money and space probably are objects, what are you most likely to buy next?
We need to replace our broken Capresso coffee maker. We are making due with a nice (but for camping) stovetop percolater until summer.
14. Do you have a separate freezer for storage?
No, no room.
15. Grocery shop alone or with others?
Both. Most often, though, I tend to take one or two children with me to help make the trip go faster. We divide up the grocery list and meet back at the check-out line.
16. How many meatless main dish meals do you fix in a week?
I'd prefer all of them, but hubby likes his meat. We eat a lot of cheese, though!
Probably about ten.
17. If you have a decorating theme in your kitchen, what is it? Favorite kitchen colors?
honey-oak wood tones; a free-standing double hutch-type cabinet that mimics the design of an old Hoosier cabinet. Old, red-handled kitchen tools, barn-red enamelware and pans; dk. red and white food and tea tins, small decorative pitchers, coffee signs and old grinders, and a few red chile ristras. Favortie colors: Barn red, with accents of yellow-gold and dk. coffee brown. White applicances.
18. What's the first thing you ever learned to cook, and how old were you?
Cheese biscuits in fifth grade. I was ten.
19. How did you learn to cook?
I helped mom a little bit starting around ten. We had a cooking unit at school around that age, as well. Took home-ec. my Freshman year in high school, but mostly, Mom did almost everything.
20. Tag two other people to play.
Leslie at Abiding
Katie at CM, Children and Lots of Grace
I've been tagged by coffeemama from Our Blue Castle to play along.
1. How many meals does most of your family eat at home each week? HOw many are in your family?
18 meals; six people. Hubby runs the before and afterschool care program (as well as teaching), so he eats breakfast and lunch and after school snack at his school~oftentimes skipping lunch.
2. How many cookbooks do you own?
20-25
3. How often do you refer to a cookbook each week?
Almost never
4. Do you collect recipes from other sources? If so, what are some of your favorite sources
Rarely. I don't do well with loose paper scraps, (The paper mess is a hangup of mine). They tend to pile up, never to be used, only to be thrown away. If I file them away, they are out of site and out of mind, and I rarely refer back to them again. I *DO* like being able to go online (to cooks.com) to find any special recipe that I want to use. I DO buy a cookbook if I am in another country, of that country's typical dishes.
5. How do you store those recipes?
I have a bunch of my Granny's recipes in a small binder that I made in early marriage. I also have a shoebox of favorites from early marriage and Boston that I finally got out of the tiny cabinet above the fridge. It had been stored there for 13 years (as I said, out of site, out of mind) without ever looking into it for our old favorites (for example: spoon bread).
6. When you cook, do you follow the recipe pretty closely, or do you use recipes primarily to give you ideas?
Yes and no. For baking, I follow it pretty much to the T. Hubby and I both cook from memory, possibly adding our own ideas and flair to a given dish.
7. Is there a particular ethnic style or flavor that predominates in your cooking? If so, what is it?
Hubby loves to use chiles for spice in almost anything he cooks. My favorite addition is oregano, cilantro, or soy sauce. So, Mediterranean, Mexican, then Asian would be our most common themes.
8. What's your favorite kitchen task related to meal planning and preparation? (eating the finished product does not count)
Chopping and sauteing the onions; Serving up our food in bowls to be taken to the table.
9. What's your least favorite part?
Preparing the lettuce for a salad.
10. Do you plan menus before you shop?
Rarely.
11. What are your three favorite kitchen tools or appliances?
kitchen shears; cappuccino maker; milk foaming whipper :-)
12. If you could buy one new thing for your kitchen, money was no object, and space not an issue, what would you most like to have?
A deep freezer
13. Since money and space probably are objects, what are you most likely to buy next?
We need to replace our broken Capresso coffee maker. We are making due with a nice (but for camping) stovetop percolater until summer.
14. Do you have a separate freezer for storage?
No, no room.
15. Grocery shop alone or with others?
Both. Most often, though, I tend to take one or two children with me to help make the trip go faster. We divide up the grocery list and meet back at the check-out line.
16. How many meatless main dish meals do you fix in a week?
I'd prefer all of them, but hubby likes his meat. We eat a lot of cheese, though!
Probably about ten.
17. If you have a decorating theme in your kitchen, what is it? Favorite kitchen colors?
honey-oak wood tones; a free-standing double hutch-type cabinet that mimics the design of an old Hoosier cabinet. Old, red-handled kitchen tools, barn-red enamelware and pans; dk. red and white food and tea tins, small decorative pitchers, coffee signs and old grinders, and a few red chile ristras. Favortie colors: Barn red, with accents of yellow-gold and dk. coffee brown. White applicances.
18. What's the first thing you ever learned to cook, and how old were you?
Cheese biscuits in fifth grade. I was ten.
19. How did you learn to cook?
I helped mom a little bit starting around ten. We had a cooking unit at school around that age, as well. Took home-ec. my Freshman year in high school, but mostly, Mom did almost everything.
20. Tag two other people to play.
Leslie at Abiding
Katie at CM, Children and Lots of Grace
21 April, 2005
* Spanakopeta Recipe *
My favorite food...and it is terrific served with Hummus and hot pita bread.
Hubby's and my 20th Wedding Anniversary is coming up soon, and it is tradition for us to go out for Greek food, in honor of our anniversary and our honeymoon trip to Greece, so many years ago.
Spanakopeta
(Greek Spinach Pie)
from Betty Wason's Greek Cookbook, MacMillan Co., 1969
12 phyllo pastry sheets
2 pounds spinach, cooked and chopped,
or 2 packages frozen spinach, chopped
Minced and chopped dill (about 1 tsp.)
2 Tbsp. minced parsley
salt, to taste
1 or 2 eggs
½ pound feta cheese
½ cup melted butter or olive oil
If frozen spinach is used, cook as directed on package, draining well. Add dill, parsley, and salt to taste. Add 1 egg to the cooked spinach. Add the second egg to the cheese, which has been crumbled. I also like to add a small bit of finely chopped onion to this mix.
Butter a square baking dish (9 x 9 inches) and place 6 sheets of phyllo pastry in the bottom, brushing each sheet with melted butter or oil. Add a layer of all the spinach, dill, and parsley mixture, then a layer of all the cheese. Cover with 6 more phyllo sheets, buttering or oiling between each one. Now, it is helpful to keep a thin, damp cloth on top of the whole stack of phyllo dough from which you are getting new leaves to layer in your baking dish. This keeps the phyllo from drying out and sticking together.
With a sharp, pointed knife, cut the top layer of pastry into squares. Aprinkle water over top to keep phyllo paste from curling. Bake at 350 degrees F for 35-40 minutes until pastry is golden. Remove from the oven, cool until it can be handled, then turn out upside down on a baking sheet, and return it to the oven so that the undercrust can become crisp and golden. Cut the pie into squares and serve. Excellent hot, also very good cold. makes about 6 entrée servings.
Doubles nicely, place and bake in 13 x 9 baking pan.
Hubby's and my 20th Wedding Anniversary is coming up soon, and it is tradition for us to go out for Greek food, in honor of our anniversary and our honeymoon trip to Greece, so many years ago.
Spanakopeta
(Greek Spinach Pie)
from Betty Wason's Greek Cookbook, MacMillan Co., 1969
12 phyllo pastry sheets
2 pounds spinach, cooked and chopped,
or 2 packages frozen spinach, chopped
Minced and chopped dill (about 1 tsp.)
2 Tbsp. minced parsley
salt, to taste
1 or 2 eggs
½ pound feta cheese
½ cup melted butter or olive oil
If frozen spinach is used, cook as directed on package, draining well. Add dill, parsley, and salt to taste. Add 1 egg to the cooked spinach. Add the second egg to the cheese, which has been crumbled. I also like to add a small bit of finely chopped onion to this mix.
Butter a square baking dish (9 x 9 inches) and place 6 sheets of phyllo pastry in the bottom, brushing each sheet with melted butter or oil. Add a layer of all the spinach, dill, and parsley mixture, then a layer of all the cheese. Cover with 6 more phyllo sheets, buttering or oiling between each one. Now, it is helpful to keep a thin, damp cloth on top of the whole stack of phyllo dough from which you are getting new leaves to layer in your baking dish. This keeps the phyllo from drying out and sticking together.
With a sharp, pointed knife, cut the top layer of pastry into squares. Aprinkle water over top to keep phyllo paste from curling. Bake at 350 degrees F for 35-40 minutes until pastry is golden. Remove from the oven, cool until it can be handled, then turn out upside down on a baking sheet, and return it to the oven so that the undercrust can become crisp and golden. Cut the pie into squares and serve. Excellent hot, also very good cold. makes about 6 entrée servings.
Doubles nicely, place and bake in 13 x 9 baking pan.
15 April, 2005
~Whistle While You Work~
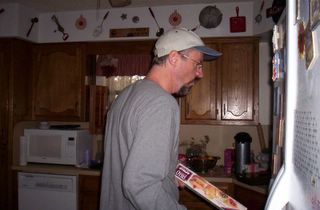
This is hubby whistling, while he is about to give me a hand making Spanakopeta (Greek Spinach Pie). With the leaves of phyllo dough, one needs an extra pair of hands; buttering, layering, buttering, layering, and so on...without tearing the layers too much! I think Spanakopita is my favorite food in the world.
07 February, 2005
Subscribe to:
Posts (Atom)